Home » Posts tagged 'suspension'
Tag Archives: suspension
Corner Weight & Cross Weight
One of the additional benefits of an adjustable suspension, besides being able to dial-in ride-height and rebound, is the ability to corner weight the car. “Corner weight” refers to the static weight at each of the four wheels. 50-50 front to rear weight distribution is ideal to maximize handling on most road cars, but a distant pipe-dream for MINI owners. “Cross-weight” compares the lateral total (Rear Left + Front Right) to the total weight. If that percentage is over 50%, that’s called “wedge” in NASCAR terms. (Reverse wedge if under 50%). Corner-weight can be changed by adding ballast if necessary to make a weight minimum, or making, adjustments to spring perches and sway-bar pre-tension in an attempt to equalize the weight at each wheel. But more importantly, what matters for handling is near 50% cross-weight in a FWD car.
Take my car as an example: I have an R53 with a rollbar, AC delete, race seats, and a gutted interior. With driver and a full tank of gas, my car weighs 2,685 pounds. 61.8% of that weight is in the front; 38.2% is in the rear. That is slightly better than stock which had a weight of 2,853 (with driver) and 62.7/37.3 weight distribution.
The first time we attempted to corner-weight my car, I only had an adjustable suspension to work with. I didn’t have adjustable drop-links on the swaybars. That resulted in a cross-weight of 52.4%. That isn’t terrible, but still helped to contribute to under-steer in left turns due to wedge. We installed Alta adjustable drop-links on both swaybars, and without adding any ballast, tried again. The results are below:

Each corner is within 5 lbs. of the target weight. Cross-weight is 50%. The car now seems very neutral in left or right corners, which for MINI means equal understeer in both directions, as opposed to excessive understeer when turning left. Result.
Read more about cross-weight at GRM. If you want someone to do the math for you, see this corner balance calculator.
Coilover Suspension & the Tyranny of Choice
“Logic suggests that having options allows people to select precisely what makes them happiest. But, as studies show, abundant choice often makes for misery.” Psychologist Barry Schwartz didn’t know it at the time, but he was talking about Coilover Suspensions when he wrote those words in Scientific American back in 2004. Like Robbin Williams shopping for Coffee in the movie “Moscow on the Hudson”, the choice of coilovers can be overwhelming. With height adjustable, 2-way, 3-way, remote reservoir, club-sport, electronic dampening control — the choices are daunting. If you have no prior experience with coilovers, this post offers a framework for better decision-making before you invest in an expensive coilover system that you don’t like.
Maybe it’s not the car. Maybe it’s you. Unless and until you can clearly articulate what you don’t like about your old suspension and the characteristics you seek in the new one, just purchasing a set of coilovers isn’t the answer.
How did you end up with your current suspension? If you’re driving a sporty German car (and if you’ve found this blog, you probably are), then your suspension went through a development process more or less something like this: Given your car’s intended purpose (sporty weekend get-away; grocery getter; executive tourer, etc.) intelligent chassis and suspension engineers tuned it for German roads. Average in-town speeds (30 MPH) are generally lower than the U.S., and highway (autobahn) speeds are much higher. The car has to be able to stop from its top speed without brake fade repeatedly; it must pass the moose-test and most importantly for our analysis, was designed assuming that the roads are smooth and generally free of potholes. In other words, their roads are not American roads. So to prepare that same car for the American market, they did three things: They raised the ride-height; they assumed the passenger load is heaver; and they softened the suspension to increase compliance on our bad roads. (OK, I made up the second part, but I suspect it to be true none-the-less.)
When you come to a fork in the road, take it. To figure out where you’re going, start your analysis by describing what you like about your current set-up on the highway. Does it pass the “spouse test” (no complaints from the significant other on long trips)? Do you have confidence for making sudden, unexpected high-speed maneuvers (on the road, not with the spouse)? Does it absorb the seams and road irregularities? How about when only one wheel or one side of the car hits a pothole, does it absorb the impact or is it jarring? Does your car have the “sport” suspension from the manufacturer? Is it the U.S. specific suspension (as opposed to Euro or “Rest of the World” [ROW] suspension in Porsche terms)? How does it perform at the track? How does it compare to other similar cars that have modified the stock suspension? What did you like/dislike about other people’s choices?
Let’s assume the answers to the questions above are: U.S. “Sport” suspension, good on the bumps, and passes the spouse test. (Typical for most BMW/MINI sport suspension owners and Porsche drivers with the M030 sport suspension.) Will you be happy with just buying lowering springs and reusing the stock struts? The answer is (generally) no, not in the long term. By not changing the shock to match the shorter spring, you will loose compliance. You will find yourself more often on the bump-stops, and generally with a harsher ride. Many sporty drivers say they can live with the trade-off. Most spouses do not. This is usually the path that got someone thinking about coilovers in the first place: they tried performance lowering (sport) springs, and now they think they need coilovers.
Remember the speed assumptions mentioned earlier? They’re critical to suspension design. High-frequency motion occurs as your suspension reacts to irregularities on the road surface such as bumps, pot-holes, seams, etc. The car is basically in a static state on the springs, but the individual wheels need to react to the road quickly. That bump and recovery is a high-frequency event. As the suspension takes a set for a corner (weigh transfers forward under braking, then to the outside under cornering); that’s a low-frequency event. The spring and shock work together to get the right amount of body roll for good weight transfer, but not too much lean causing a loss of control. The delta between the valving that is required to deal with those two types of events is what gives each shock its unique characteristics.
Now go back to the speed and road surface assumptions above. If we’re assuming high-speed, smooth surface autobahn driving, for a given weight of car, we’ll choose a stiffer spring and shock combination. Because of the speeds involved, the weight transfer rate will be higher than for the same car in the U.S., but because the road surface is assumed to be better, you don’t have to worry about the effect of road surface irregularities as much under compression. Since in-town speed limits are also lower, when that same stiffer suspension encounters a road-seam or bump at a speed lower than in the U.S., it doesn’t transmit as much harshness to the cabin. The overall result is a lower, stiffer suspension. Many drivers seeking a more performance oriented ride are satisfied by merely finding the European (or ROW) version of their current suspension and making the swap (we did exactly that on our Porsche 996). It has the benefits that come from purchasing OEM parts as you don’t have to worry if it will all work together as a system, and it generally doesn’t hurt resale value when you go to sell the car. For many though, that’s still not enough change for track duty.
Why do you think you want a coilover suspension anyway? Do you want to be able to adjust the height; adjust compression; adjust rebound; or adjust all three things? Do you want to run springs with a smaller diameter for other reasons such as increasing negative camber in the front? The majority of coilover buyers buy them to be able to adjust the height of their cars. (On some new cars like the new BMW M3/M4, consider getting Height Adjustment Spring Systems to get height adjustability with stock shocks/struts.) Most customers who are interested in coilovers tell us three things: For the most part, they’re satisfied with the ride quality of their current suspension when cruising on the highway, but they’re willing to sacrifice a bit of comfort for better performance; they don’t like the space between a car’s tire and the wheel well (called the “Dead Cat Hole”); and they want to improve performance at the track. So let’s break those down one at a time and consider the implications for suspension options.
Highway Cruising/Occasional Track Use. If you’re generally satisfied with the ride quality, but you just want a sportier suspension, then consider coilovers that only offer height adjustment. To help you choose which one to get, start by finding out the spring rates of your current suspension. Many stock suspensions use progressive spring rates which makes this task difficult, but not impossible to do. (A progressive spring becomes stiffer the further compressed it becomes. Springs with consistent spring rates are considered linear.) A typical 3000 lb. sporty car with McPherson Strut suspension design might have springs in the 400 to 450 foot-pound per inch range. Higher if a heavier car, lower if a lighter car. If you’re happy with your current spring rate, then find a coilover with a similar rate. Just by switching from progressive to linear springs you will notice a difference in the ride. If possible, try riding in a car with a higher rate and see if you can tell the difference (especially on the track.) For a dual use (street/track) car, consider going with a spring rate that’s 50 pounds higher than your stock suspension, then fine-tune the ride with adjustable swaybars (more on that below). In this instance, if you are not interested in learning more about suspension tuning, then the right height-adjustable coilover can help you avoid the Tyranny of Choice by not having to worry about other changes in geometry that come with lowering your car and choosing dampening settings. Just set the ride height to be about where it was stock and enjoy the ride. If you want to change the ride-height, then press on.
Dead Cat Hole. Start with a baseline by measuring the ride height as the distance from the center of the wheel to the bottom edge of the fender directly over the wheel center. (This assumes stock size tires.) This is easier to measure than trying to figure out chassis height from the ground. We recommend you take two measurements as a baseline as you try to figure all of this out: Measure the wheel center to fender height for all four wheels, then measure the height from the ground to your four jack points. Compare the heights front to rear to assess Rake. Rake is defined as “the angle between the vehicle and the horizontal axis of the ground. If the back is higher than the front, you have positive rake. If the front is higher than the back, you have negative rake.” Generally, positive rake is seen as advantageous for weight transfer under braking. Measured in this fashion, most vehicles will have between three-fourths and a full inch of positive rake. It is important to maintain rake when lowering the car.
Take our 2006 MINI Cooper S test mule as an example. We were running H&R Sport Springs over Bilstein Sport Struts with SPC Adjustable Camber Plates in the front, and Hotchkis Adjustable Camber Arms in the rear. This is one of our favorite combinations for a first generation MINI owner who wants a bit of lowering and a sportier ride without switching to coilovers. We had a wheel center to arch height of 13 inches all around with 5 inches of ground clearance at the front jack point and 6 inches in the rear. But we also always felt the dampers didn’t quite match the spring-rate leading to occasional harshness, especially for high-frequency compressions on the highway (though we really like them on the track). Also, the H&R springs are not stacked straight so when adjusted to add negative camber, they tend to bind against the strut tower. As a result, we generally could get only 1.9 degrees of negative camber in the front. Since the next step up in performance was to switch to a true coilover, we decided to give the Speedtech Coilovers a try.
The recommended height from the spring seat to the pinch-bolt on the front suspension is being between 7.5 and 8.3, and in the rear between the spring seat and lower strut mounting bolt it is between 7.3 and 8.3 inches. That range for the front, however, assumes you are using the stock mounting plates. The SPC Camber plates we were using make the entire strut assembly height 1/2 an inch shorter than when using stock plates (which we initially forgot) so you have to take that into consideration when trying to figure out where to start. We thought that the top end of the range (8.3 inches) was likely close to where we were starting with the H&R springs so we initially set both ends at 7.75 inches from spring perch to measuring point respectively.

That guess was pretty good for the rear so we left it there and adjusted camber to negative 1.75 degrees with 1/8 inch of total toe in. (Alignment for high-speed driving is a whole other topic to cover some day.) The front was too low because we didn’t compensate for the lowering effect of the camber plates. The final setting ended up being 8.125 inches from the spring perch to pinch-bolt. We set the alignment to 2.2 degrees of negative camber with zero toe. We can probably get a little more negative camber out of the set-up, but will wait and see how the tires wear once we get more time with this set-up at the track. These settings resulted in 4.5 inches of ground clearance at the front jack point and 5.5 inches in the rear, and 12.5 inches center to arch in the front and 12.75 inches center to arch in the rear. When we get an alignment again in the spring, we’ll probably bring the rear down another quarter of an inch to reduce the rake a little bringing the rear recommendation down to 7.5 inches.
When you lower the car you need to be concerned with other changes that also occur to the suspension geometry. Generally there is an increase in negative camber that comes with lowering. Some increase is usually considered good thing for front-end traction, but can be a bad thing if it leads to premature tirewear in the rear. Most coilover users will also want to pick-up adjustable camber plates for the front (many are included in the coilover design, check with the manufacturer) and camber arms or links for the rear. For cars that see track use, tire choice also affects camber needs with some tires working best with lots of negative camber.
How low can you go? Assuming you are not limited by the angle of your driveway or height of any speedbumps, you can test your new coilover limits by disconnecting any sway bars and installing the strut with bumpstop and no spring. Your coilover manufacturer should tell you the dimensions of your springs when at maximum compression. Install your road wheel and use a floor jack to raise the wheel carrier until the strut is fully compressed (against the bumpstop) or the tire begins to bind with the well liner. Using the dimension of your spring at maximum compression, measure down that distance from the spring cap to the barrel of the strut. Mark that spot and put a second mark 1/2 inch above it (closer to the spring cap). This second mark is the lower limit of where you can safely position the threaded spring-seat lock-ring on the strut barrel. The half inch change to the measured height was there to correct for camber correction later in your alignment. (Remember, this is the limit of how low you could go, not how low you should go. We generally do not recommend lowering MINIs beyond 4 inches as measured at the jack point.) For this MINI application, we’re already pretty close to the limit in the rear, but the front could go quite a bit lower. It just wouldn’t be very practical.
Track Performance. The ST Suspension for MINI is essentially the same as the KW v1, but at a lower price point. The coilovers are height adjustable, but the dampening is fixed. We played with Koni adjustable dampers before and realized we never adjusted them. We always felt we got more out of adjusting the sway-bars than the struts — which either says something about the geometry of the MINI or our ability as suspension engineers (or lack thereof.) We wanted a suspension that was fairly compliant; offered a positive feel on turn-in; and wasn’t harsh for the high-way trip to the track. And we think we nailed it with this one.

We run a 22mm adjustable rear swaybar. Thicker swaybars effectively increase the spring rate relative to body roll, but not when both wheels across the axle move in unison such as when you hit a seam on the highway. On max performance summer tires with the bar on full stiffness, we had just a little too much throttle-lift over-steer for my taste (and skill), but set on the middle setting, it was just about perfect. (Because we were running a new configuration of the track, we couldn’t compare lap-times to previous weekends, but could tell we were hanging better with some of the faster runners than usual.) We can now fine-tune the suspension by playing with sway-bar settings and tire pressures, and worry about dampening rates. Once we figure out how to maximize this set-up, then it’s time to start thinking about two- and three-way adjustable coilover systems. But that’s a subject for future posts.
We’d like to hear from you. What was your experience with your first coilover system?
Want more?
Learn more about understanding shocks here.
Learn about the MINI suspension here.
MINI Front Swaybar DIY
Front Sway-bar Replacement: The R53 subframe design is a wonderful example of compact packaging. Unfortunately the tight confines of the front end makes replacing the front sway-bar a time-consuming activity. It is not particularly difficult, just time-consuming, especially if you don’t have access to a lift. The process outlined below will allow you to drop the front subframe enough to remove the sway-bar. As usual, this description is a general explanation of the process. Refer to your Bentley Manual or other workshop guide before taking this on yourself. Disclaimer: These instructions are provided for general information. Use at your own risk. No wagering.
1. Safely support your MINI on jack stands and disconnect the battery. Set the jacks high enough to work under the subframe if necessary.
2. Put the front end into service mode by removing the front bumper cover, wheel liners, and front lower skid plate.
3. Remove the front bumper. Remove the front crash tubes. Use penetrating oil if necessary. Be sure not to misplace the plastic inserts once the crash tubes are removed. (While the bumper is off, clean between the radiator and condenser.)
4. Slide under the car and remove the power-steering fan and unplug it from the power-steering pump. Reaching to the top of the power-steering pump, carefully unplug the two electrical connections to the pump. If you are just lowering the subframe far enough to get to the sway-bar, it is not necessary to unplug the top plug.
5. Working from the top of the engine, open the clamp holding the power-steering reservoir and make sure it can drop into the engine freely as the subframe is lowered.
6. Disconnect the sway-bar from the lower drop link that is attached to each strut.
7. Using a ball-joint separator, separate the tie-rods from the front wheel hubs.
8. Above the steering rack toward the firewall is the steering knuckle. Turn the steering wheel to position the nut so you can remove it from the bolt. Fold the knuckle back on itself.
9. Disconnect the control arm bushing bracket from the body frame on each side.

10. Place your floor jack under the subframe at the circular opening and support the weight of the subframe with the floor jack.
11. Working behind each strut, disconnect the subframe from the body.
12. Disconnect the lower engine mount.
13. Remove the six bolts holding the rear of the subframe to the body shell.
14. Using the floor jack, lower the subframe far enough to reach the four bolts holding the sway-bar to the top of the subframe. Spray penetrating oil. If necessary, use a block of wood to wedge between the subframe and the body to get enough room to get a ratchet on the sway-bar bolts. These bolts are torqued to 122 ft lbs of torque so it will take some leverage to loosen them.
15. Carefully slide out the old sway-bar and replace with the new one.
16. Installation is the reverse of removal.
Notes: Be sure to torque all bolts to the required spec. The captured nuts in the body for the control arm bracket bolts torque to only 48 lbs not the 63 lbs specified in some manuals. If these nuts are stripped, try rethreading by boring the holes to 25/64th inch then thread to 7/16th inch (20NF pitch). If that doesn’t work, they will have to be cut out and new nuts welded in ($$$).
Torque Specs in FT LBS
Sway-bar end link to sway-bar 41
Tie-rod to steering knuckle 38
Front subframe to chassis 74
Crush tubes 74
Sway-bar to subframe 122
Lower engine mount 74
Power-steering pump 14
Rear subframe to chassis 74
Control arm bracket to chassis 48
None provided: PS Reservoir bracket; Steering arm knuckle
MINI Suspension Compliance
Passengers in the GeorgeCo MINI often complain that they are just but one pothole away from losing a filling. With the stiffer lowering springs and beefy swaybars fore and aft, the effective spring rate was probably in the neighborhood of 450 lbs. By way of comparison, the stock spring rate is somewhere around 200-220 lbs. A stiffly sprung car is great for a smooth racetrack, but can be torture on the street. Having spent a few days at the track in the Porsche with a completely stock suspension, I have come to the conclusion that the MINI doesn’t need to be so stiff. (Remember the early posts about this car when I said I wasn’t going to turn it into a track car. Well, wrong…)
After some additional critical reflection I thought I could achieve 3 objectives by designing a suspension with more compliance: 1.) Improve the ride as measured by the right-seat passenger dyno; 2.) Keep the modifications that correct the glaring deficiencies of the geometry (under-steer and lack of front camber); and 3.) Be cost-neutral. It turns out, there was an unexpected bonus as well: reducing un-sprung weight.
First a recap. Starting with a Stock 2006 Cooper S:

Make the following modifications: Bavarian Autosport Performance Lowering Springs (2″+ drop); Bilstein Sport Struts/Shocks; Eibach adjustable camber plates; JCW Sport Brake Kit; Madness Lower Brace; Powerflex Control Arm Bushings; H&R 27mm Front Swaybar; Alta adjustable endlinks front and rear; Alta 22mm 3-way adjustable swaybar; and HR Sport Camber Arms. The result:

Slammed, stiff, and neutral. No hint of under-steer. Even front tire wear. About 3.5 inches of ground clearance (problematic). Harsh under rapid compression of suspension (pothole). Wonderful at the track. Not so much fun on the freeway. All of the modifications except the front swaybar are quite conventional. The stiff front swaybar really transforms the way the car turns-in under heavy braking, but at a cost. If the front end isn’t loaded, steering became somewhat vague. Definitely not to everyone’s taste.
I decided to keep the bits I liked, sell off the rest, and use the money to buy anything that I didn’t reuse from stock. Gone were the BavAuto springs, replaced by H&R Sport Springs. I Swapped the front swaybar back for stock and got a screaming deal on a 19mm rear bar to better balance the front. I Sold the adjustable endlinks since they aren’t needed with the H&R Springs (the drop is only 1.25 to 1.5 inches so the links don’t really need to be shortened.) Gone was the Madness bar. JCW brakes were replaced by stock along with new stock rotors. I kept the Powerflex bushings and Bilstein struts, but swapped the Eibach adjustable plates for Ireland Engineering fixed camber plates. What I lost in adjustability I more than made up for in comfort. I broke even on cost and shed 26.5 lbs in weight (21 lbs unsprung) and all but 1.5 from the front.) Ride height is somewhere between the two extremes:

So if you superimpose them over each other, you get:

Things that go Wump in the Night
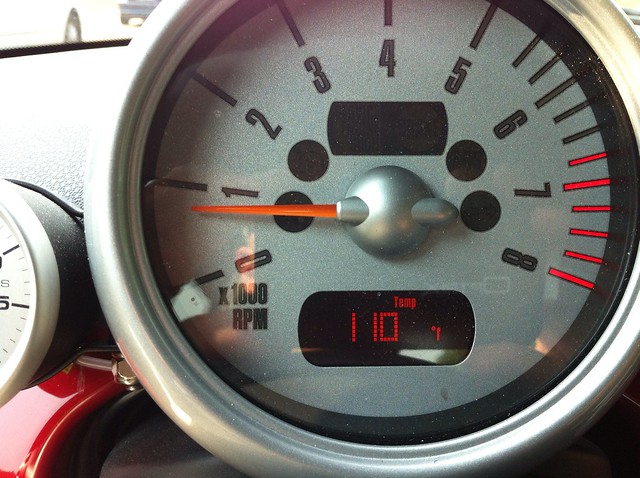
Driving home yesterday when it was 110 degrees, the guy ahead of me swerved at the last second and served up a chunk of cast iron pipe for me to drive into. It was a broken piece with an end-cap, perhaps eight size inches in diameter and six inches tall. My car is only 4.5 inches off the ground. Concrete center divider to my left, traffic to the right, I could only choose where to hit it, not if: Straddle it and risk puncturing the oil-pan; hit it with the wheel, cut a tire and bend a rim. I went for the most clearance — between the wheel and the center-line of the car.

Most of the impact was taken by the lower stress brace. The darn pipe turned up as it wedged under the car, pitched me about 20 degrees to the left (fortunately I was approaching an intersection by then with an empty turn lane on my left) lifting the right-side of the car off the ground with a big “Whump”. D’oh. Not good. I pulled over expecting to see oil or brake fluid gushing from below. Everything looked good and the car still tracked straight so I headed home.

Getting under it today I could survey the damage. The brace sacrificed itself and took most of the impact, but the sub-frame was dented as well. I know the sub-frame on these cars is pretty stout.

So here’s the question: Do I worry about the sub-frame damage if the car is otherwise still in alignment? Replace or just weld a reenforcing panel if otherwise straight? It looks like the sub-frame (Part #31106763721, “Front Axel Support”) runs about $600 (and involves dis-assembly of the entire front end of the car). If I go down that route, anything I should upgrade at the time? I need a new clutch anyway and was already thinking about replacing the control arm bushings with powerflex bushings. Is it easier to replace the front swaybar if everything is out? In for a penny, in for a pound… Any other bushings which I should look at? Or can I just pull the crease and weld on a patch panel to add some strength and not worry too much about it?

Update 7/22/12: I finally got the replacement lower stress bar from Madness Motorworks (formerly MINI-Madness). The good news is that the mounting holes still line up. That means that the bar deformed under the impact but didn’t deform the sub-frame along the way.

Now that I’ve changed the suspension (again) to Bilstein Struts, the ride-height is slightly higher. Hopefully the extra 10 mm in higher ride-height will keep me off of speed-bumps and road debris, but the bar is still the low point in ground clearance. At least for now it’s easy to spot….
